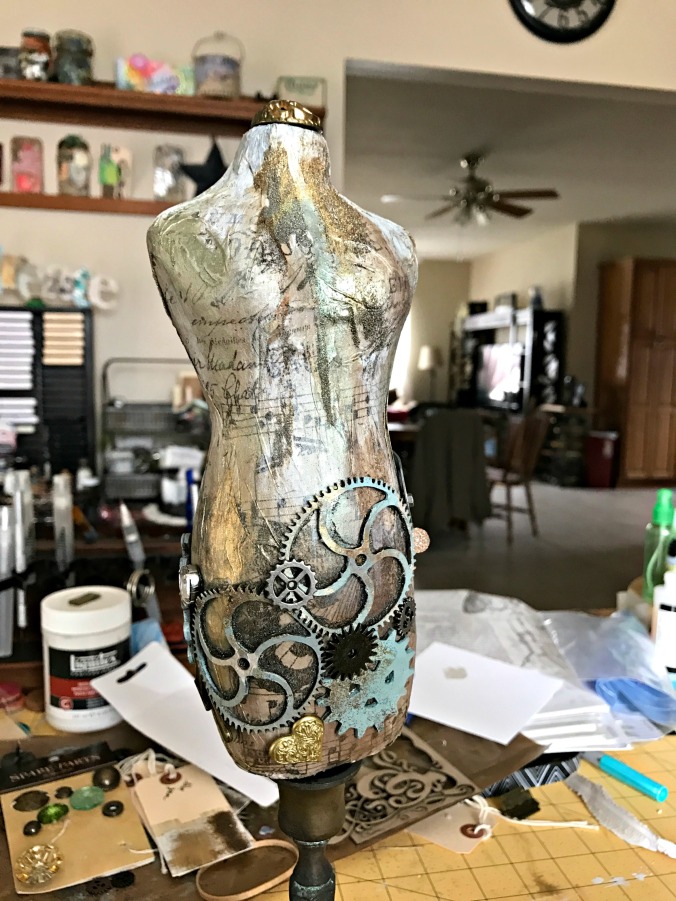
The madness continues. As I said I’m currently clearing, purging, sorting and organizing my studio. So as things dry and set up, I’m tearing into storage, bins, and getting things put away properly. One of the many things popping up is button cards, random notions, random chipboard and like items. Why? Because at the end of every class, every crop and every retreat, we have to pack up. And it’s the END so we tend to get lazy and just start scooping up our gear and getting it into our vehicles. So down in the bottom of my tool bag, is STUFF. The neat and tidy gear that arrived to the event is no more! The end result is I’m finding some little treasures to use on my mannequin. 
Something I learned about the laser cut chipboard, if you’re able, peel a layer off. After painting and prepping it, you’ll find it will shape better on your 3D projects. I learned too late, so I’m taking advantage of it’s thickness by tucking other items in close.
Adhesive is another thing I learned. Use GREAT adhesive, and step away and let it dry before moving on to the next item. You’re gonna bump it off, it will slide due to gravity, some objects are heavy and the weight will work against you. Rubber bands are an awesome tool in this case.
Don’t forget the back of the piece you’re working on. Right now it’s a little bare but I found some little do-dad’s that I need to prep before I adhere them. I’m also gonna check out my jewelry box for some broken bits and pieces. The rhinestone touches really make me happy. So, it needs more rhinestones! No, I still haven’t cut the chipboard for the base. I’ve decided I want to trim out the base a little, so now I’m digging and searching from some corrugated cardboard so there’s an edge to adhere to. That’s all for today. Time for some domestic engineering. Again, thank you for stopping by!


![IMG_2063[1]](https://messymakins.files.wordpress.com/2017/06/img_20631-e1497562755505.jpg?w=676)
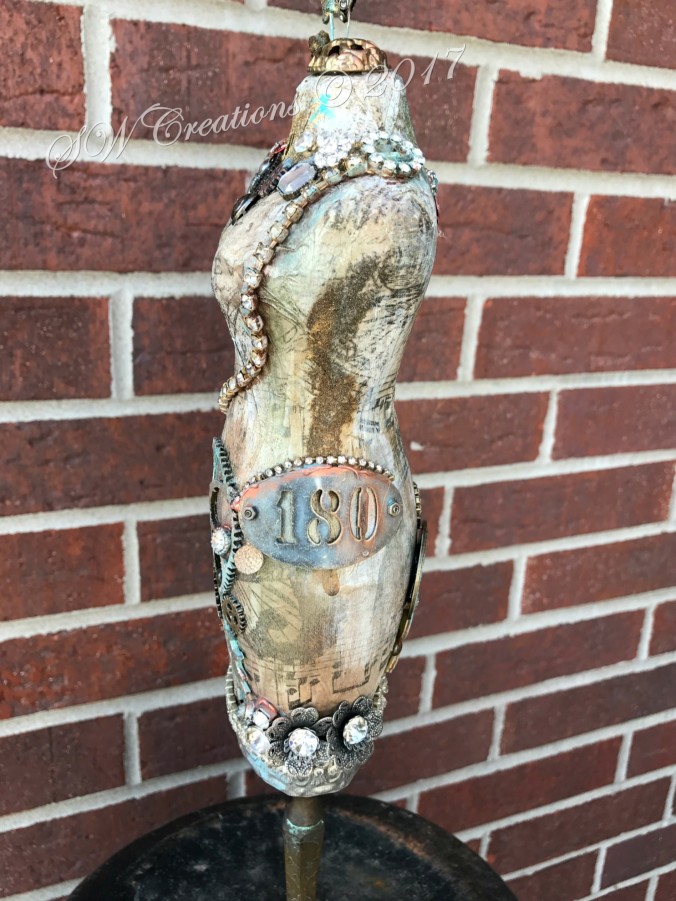
![IMG_2049[1]](https://messymakins.files.wordpress.com/2017/06/img_20491-e1497562795780.jpg?w=676)
![IMG_2064[1]](https://messymakins.files.wordpress.com/2017/06/img_20641-e1497562770896.jpg?w=676)


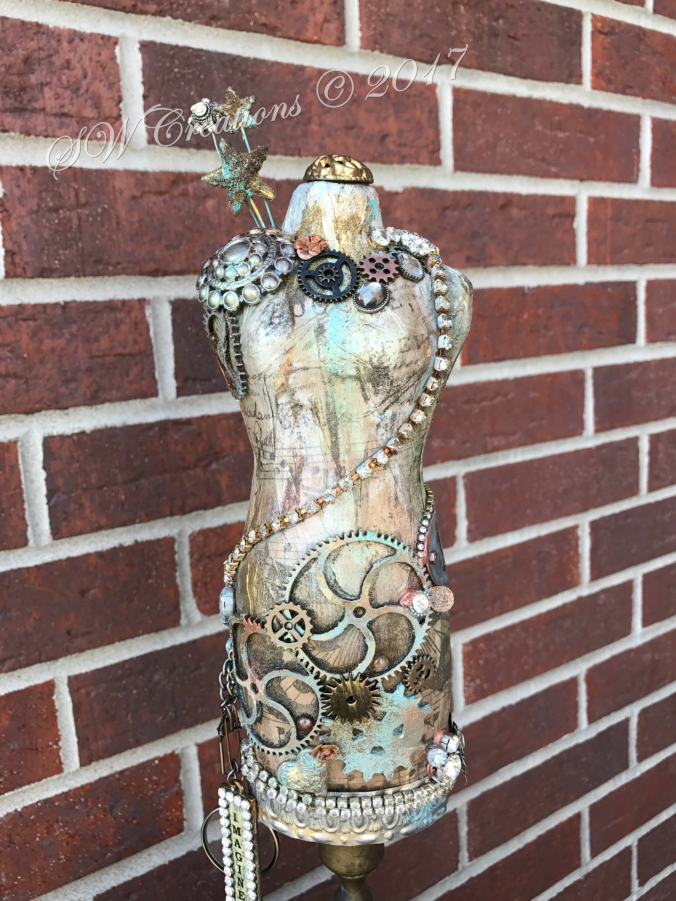
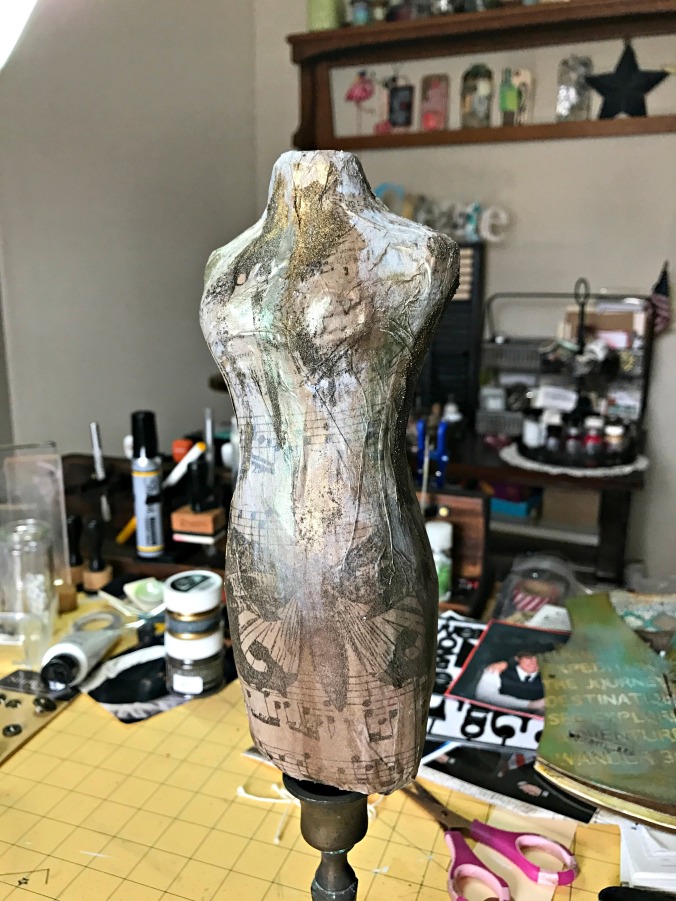
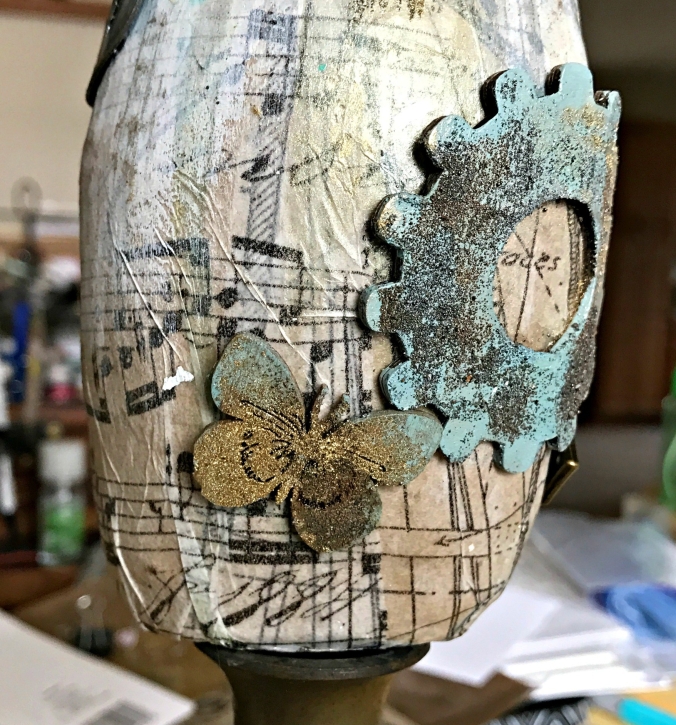
![IMG_1403[1]](https://messymakins.files.wordpress.com/2017/03/img_14031-e1489012342885.jpg?w=676) We are in the home stretch! Found some more junky goodness in my mess, ‘er stash!! Valuable lesson learned, put the cap on! I managed to knock over my beloved bronze distress paint and nearly depleted the entire bottle!! But it’s on my shopping list so I won’t forget!
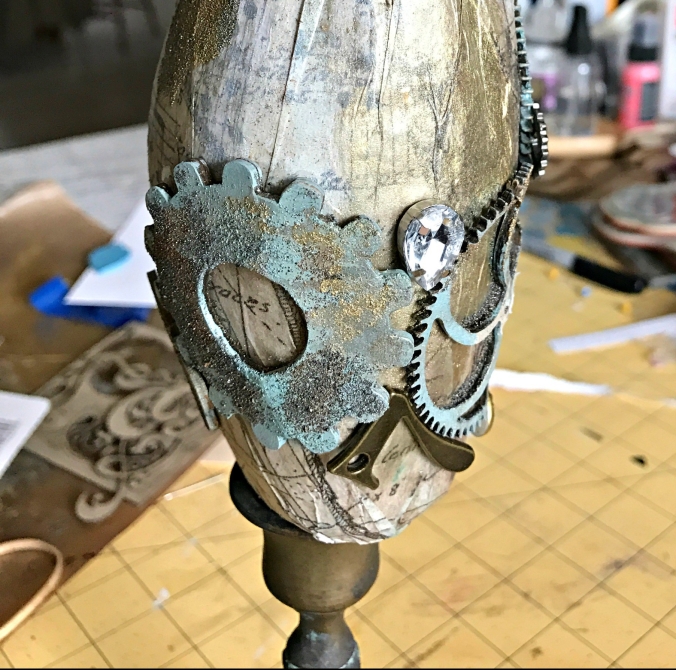
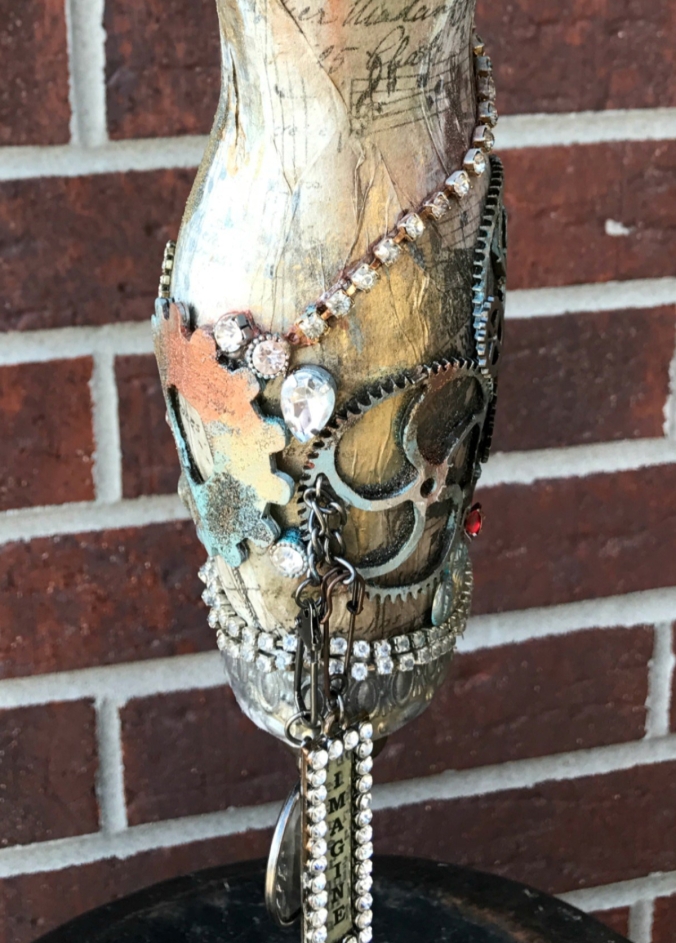
We are in the home stretch! Found some more junky goodness in my mess, ‘er stash!! Valuable lesson learned, put the cap on! I managed to knock over my beloved bronze distress paint and nearly depleted the entire bottle!! But it’s on my shopping list so I won’t forget!![IMG_1404[1]](https://messymakins.files.wordpress.com/2017/03/img_14041.jpg?w=676) This is a vintage button that I LOVE and been hoarding, waiting for the perfect project to add it to. It has a shank that is way too heavy to clip off, so I packed the negative space with some “snot dots”. Okay they’re better known as therm-o-web Zots. I used the dimensional (pop up) dots. Then I pushed the button down hard onto the figure and quickly pulled it back off. It left an indention where the shank hit, so I used my X-acto blade and made a small hole. After that, I applied liquid glue around the dots and on the shank and popped the button into place. (Yup, used those fancy rubber bands to hold it in place while drying.) Some of these little do-dads & rhinestones were brads so I took my little clippers and snipped the back off for easier application!
This is a vintage button that I LOVE and been hoarding, waiting for the perfect project to add it to. It has a shank that is way too heavy to clip off, so I packed the negative space with some “snot dots”. Okay they’re better known as therm-o-web Zots. I used the dimensional (pop up) dots. Then I pushed the button down hard onto the figure and quickly pulled it back off. It left an indention where the shank hit, so I used my X-acto blade and made a small hole. After that, I applied liquid glue around the dots and on the shank and popped the button into place. (Yup, used those fancy rubber bands to hold it in place while drying.) Some of these little do-dads & rhinestones were brads so I took my little clippers and snipped the back off for easier application!![IMG_1405[1]](https://messymakins.files.wordpress.com/2017/03/img_14051-e1489013160292.jpg?w=676)